轉貼來源:https://pydio.com/en/docs/kb/system/installing-freebsd-nginx-and-php-fpm
Installing the FreeBSD Ports Tree:
First, you need to download the source code for the ports needed with this command:
portsnap fetch extract
Upgrading pkg:
Next, you need to upgrade pkg, which is used to install ports and FreeBSD packages with the following command:
cd /usr/ports/ports-mgmt/pkg && make reinstall clean
Installing nginx, PHP, and MySQL:
Installing nginx:
Now you need to run the following command to get your jail or system ready to install nginx:
cd /usr/ports/www/nginx && make config-recursive
When a configuration dialog pops up, accept the defaults.
In the same directory, run this command to begin the installation of nginx:
make install clean
A dialog box will popup asking what modules to add when compiling nginx, check the following in addition to the defaults:
HTTP_DAV, HTTP_GZIP_STATIC, HTTP_PERL, HTTP_SSL, HTTP_DAV_EXT
On future dialog boxes, accept the defaults.
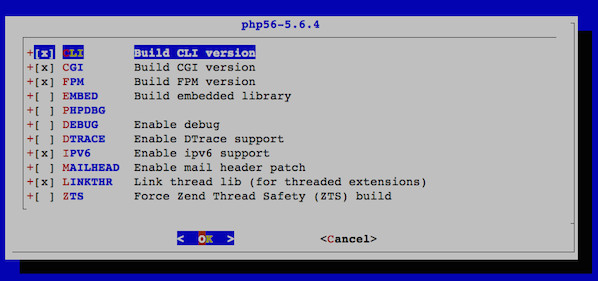
Installing PHP:
Next, run the following to install PHP5:
cd /usr/ports/lang/php5 && make install clean
A dialog box will popup, asking what options to add when compiling PHP. In addition to the defaults, select:
FPM
On future dialog boxes, accept the defaults.
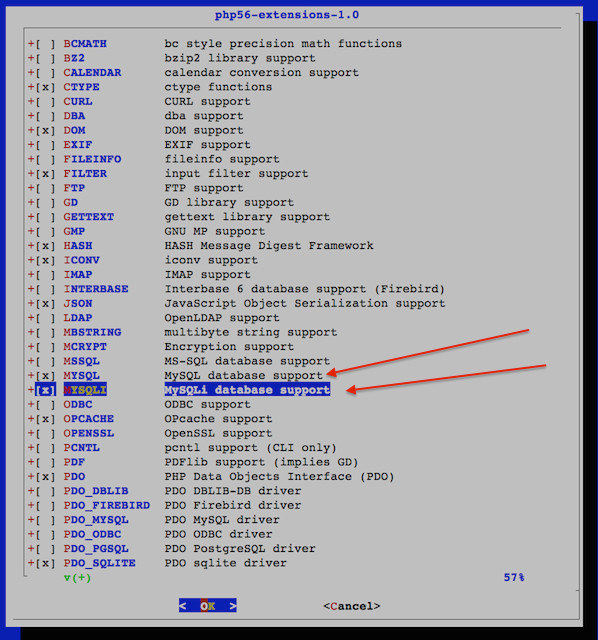
Next, run the following to install PHP5-Extensions (Modules):
cd /usr/ports/lang/php5-extensions && make install
A dialog box will popup asking what modules to add when compiling PHP-Extension. In addition to the defaults, select:
CURL, GD, IMAP, MBSTRING, MCRYPT, MySQL, MySQLi, OPENSSL, PDO_MySQL, ZIP, ZLIB
On future dialog boxes, accept the defaults.
Installing MySQL:
Now, run the following command to install MySQL:
cd /usr/ports/databases/mysql55-server/ && make install clean
Configuring Auto-start:
Next, you need to make nginx, PHP-FPM, and MySQL start on boot. To do this, edit the rc.conf file with the following command:
ee /etc/rc.conf
Then add the following lines at the end of the file:
nginx_enable="YES"
php_fpm_enable="YES"
mysql_enable="YES"
Configuring MySQL:
To configure MySQL, create the following configuration file with:
ee /usr/local/etc/my.cnf
Then add the following:
# The MySQL server configuration
[mysqld]
socket          = /tmp/mysql.sock

# Don't listen on a TCP/IP port at all.
skip-networking
skip-name-resolve

#Expire binary logs after one day:
expire_logs_days = 1
This configuration will disable networking, which you won’t need since Pydio and MySQL will be in the same jail/system. You’ll have to modify this if you plan to have them on separate systems or jails.
Now you can start MySQL with the following command:
service mysql-server start
Next, to further secure MySQL, run the following:
mysql_secure_installation
This command will start up a wizard and ask a series of questions, it is fairly self-explanatory.
Creating the MySQL Database:
Next, startup a MySQL command prompt with this command:
mysql -u root -p
After entering the MySQL root password, you can create a database for Pydio with this command:
CREATE DATABASE pydiodb;
Then create the database user with the following:
CREATE USER "pydio"@"localhost" IDENTIFIED BY "ChangeThisPassword";
Next assign the pydio database user the required rights to pydiodb:
GRANT ALL PRIVILEGES ON pydiodb.* TO "pydio"@"localhost";
Now run the following command to make the changes take effect immediately:
FLUSH PRIVILEGES;
Now you may quit MySQL with the following:
quit
Setting Up Your SSL Certificates:
I recommend you use a purchased and trusted certificate from a Third-Party CA. Once you do so, you may follow their instructions and place your private key and your certificate in (using the mv or cp command):
/usr/local/etc/nginx
Then rename the private key as:
server.key
And rename the certificate (this file typically contains the certificate issued to you, an intermediary CA, and a CA bundled in one crt file) as:
ssl-bundle.crt
However, if you want to use a self-signed certificate, run the following commands:
cd /usr/local/etc/nginx
openssl genrsa -des3 -out server.key 2048
openssl req -new -key server.key -out server.csr
openssl x509 -req -days 3650 -in server.csr -signkey server.key -out ssl-bundle.crt
cp server.key server.key.orig
openssl rsa -in server.key.orig -out server.key
Configuring PHP:
To configure PHP, copy the sample PHP config into production with the following command:
cp /usr/local/etc/php.ini-production /usr/local/etc/php.ini
Next, you need to edit php.ini with this command:
ee /usr/local/etc/php.ini
Then find the following in php.ini:
output_buffering = 4096
;session.save_path = "/tmp"
upload_max_filesize = 2M
post_max_size = 8M
date.timezone = America/Los_Angeles
And set them to something along these lines:
output_buffering = OFF
session.save_path = "/tmp"
upload_max_filesize = 5120M
post_max_size = 5120M
date.timezone = America/New_York
If you want to change the max size for uploads via Pydio, edit the lines upload_max_filesize and post_max_size (the config above changes it to 5GBs).
To find your appropriate timezone, visit PHP’s List of Supported Timezones.
Note: output_buffering may be listed twice in the php.ini file. I’d recommend searching through the file and commenting those out.
Configuring PHP-FPM:
Next, you must edit the PHP-FPM configuration, run the following command:
ee /usr/local/etc/php-fpm.conf
Replace the default config with the following:
[global]
pid = run/php-fpm.pid

[PYDIO]
listen = /var/run/phph-fpm.socket
listen.owner = www
listen.group = www
listen.mode = 0666

listen.backlog = -1
listen.allowed_clients = 127.0.0.1

user = www
group = www

pm = dynamic
pm.max_children = 5
pm.start_servers = 2
pm.min_spare_servers = 1
pm.max_spare_servers = 3
pm.max_requests = 500

env[HOSTNAME] = $HOSTNAME
env[PATH] = /usr/local/bin:/usr/bin:/bin
env[TMP] = /tmp
env[TMPDIR] = /tmp
env[TEMP] = /tmp
Then you must edit the fastcgi_params file with this command:
ee /usr/local/etc/nginx/fastcgi_params
And replace the default contents of the file with this:
fastcgi_param  QUERY_STRING       $query_string;
fastcgi_param  REQUEST_METHOD     $request_method;
fastcgi_param  CONTENT_TYPE       $content_type;
fastcgi_param  CONTENT_LENGTH     $content_length;

fastcgi_param  SCRIPT_FILENAME    $document_root$fastcgi_script_name;
fastcgi_param  SCRIPT_NAME        $fastcgi_script_name;
fastcgi_param  REQUEST_URI        $request_uri;
fastcgi_param  DOCUMENT_URI       $document_uri;
fastcgi_param  DOCUMENT_ROOT      $document_root;
fastcgi_param  SERVER_PROTOCOL    $server_protocol;
fastcgi_param  HTTPS              $https if_not_empty;

fastcgi_param  GATEWAY_INTERFACE  CGI/1.1;
fastcgi_param  SERVER_SOFTWARE    nginx/$nginx_version;

fastcgi_param  REMOTE_ADDR        $remote_addr;
fastcgi_param  REMOTE_PORT        $remote_port;
fastcgi_param  SERVER_ADDR        $server_addr;
fastcgi_param  SERVER_PORT        $server_port;
fastcgi_param  SERVER_NAME        $server_name;

# PHP only, required if PHP was built with --enable-force-cgi-redirect
fastcgi_param  REDIRECT_STATUS    200;
Now you can start PHP-FPM with this command:
service php-fpm start
Configuring nginx:
To edit the nginx configuration, run the following command:
ee /usr/local/etc/nginx/nginx.conf
Then replace the default config with the following:
user  www;
### Change the number of workers to the same number of cores your server has
worker_processes  4;

pid        /var/run/nginx.pid;

events {
        worker_connections  512;
}

http {
        include       mime.types;
        default_type  application/octet-stream;
        log_format  main        '$remote_addr - $remote_user [$time_local] "$request" '
                                                '$status $body_bytes_sent "$http_referer" '
                                                '"$http_user_agent" "$http_x_forwarded_for"';

        # GENERAL
        ignore_invalid_headers  on;
        sendfile                on;
        server_name_in_redirect off;
        server_tokens           off;

        #SSL
        ssl_session_cache    shared:SSL:10m;
        ssl_session_timeout  10m;
        ssl_ciphers ALL:!aNULL:!ADH:!eNULL:!LOW:!EXP:RC4+RSA:+HIGH:+MEDIUM;
        ssl_prefer_server_ciphers   on;
        ssl_protocols SSLv3 TLSv1 TLSv1.1 TLSv1.2;

        # TCP
        tcp_nodelay off;
        tcp_nopush  on;

        # Timeouts
        client_body_timeout   65;
        client_header_timeout 65;
        keepalive_timeout     65 65;
        send_timeout          65;

        # Compression
        gzip              on;
        gzip_buffers      256 8k;
        gzip_comp_level   9;
        gzip_http_version 1.0;
        gzip_min_length   0;
        gzip_types        text/css text/javascript text/mathml text/plain text/xml application/x-javascript application/atom+xml application/rss+xml application/xhtml+xml image/svg+xml;
        gzip_vary         on;
        gzip_disable      "MSIE [1-6]\.(?!.*SV1)";

        # Redirects HTTP to HTTPS
        server {
                listen 80;
                ### Change the following two lines to match your website name
                server_name example.com www.example.com;
                return 301 https://example.com$request_uri;

                # Prevent Clickjacking
                add_header X-Frame-Options "SAMEORIGIN";
        }

        # PYDIO (ssl/tls)
        server {
                listen 443 ssl;
                ### Change the following line to match your website name
                server_name example.com www.example.com;
                root /usr/local/www/pydio;
                index index.php;
                ### If you changed the maximum upload size in PHP.ini, also change it below
                client_max_body_size 5120M;

                # Prevent Clickjacking
                add_header X-Frame-Options "SAMEORIGIN";

                # SSL Settings
                ### If you are using different names for your SSL certificate and key, change them below:
                ssl_certificate /usr/local/etc/nginx/ssl-bundle.crt;
                ssl_certificate_key /usr/local/etc/nginx/server.key;
                add_header Strict-Transport-Security "max-age=16070400; includeSubdomains";

                # Set the custom error pages
                error_page 404 = /data/public/404.html;
                error_page 403 = /data/public/404.html;

                # Logs
                error_log /var/log/pydio.nginx.error.log;
                ### Uncomment the line below if you don't want nginx logging access to the server.
                #access_log off;

                # Remove direct access to the following folders & files
                location ~* ^/(?:\.|conf|data/(?:files|personal|logs|plugins|tmp|cache)|plugins/editor.zoho/agent/files) {
                        deny all;
                }

                location ~* /data/public/.*.(ser|htaccess)$ {
                        deny all;
                }

                # Stops the annoying error messages in the logs
                location ~* ^/(favicon.ico|robots.txt) {
                         log_not_found off;
                }

                # WebDAV Rewrites
                location /shares {
                        if (!-f $request_filename) {
                                rewrite ^/shares /dav.php last;
                                break;
                        }

                        if (!-d $request_filename) {
                                rewrite ^/shares /dav.php last;
                                break;
                        }
                }

                # Enables PHP
                location ~ \.php$ {
                        fastcgi_pass unix:/var/run/phph-fpm.socket;
                        try_files $uri =404;
                        fastcgi_param HTTPS on;
                        include fastcgi_params;
                }

                # Enables Caching
                location ~* \.(jpg|jpeg|png|gif|ico|css|js)$ {
                        expires 7d;
                        add_header Pragma public;
                        add_header Cache-Control "public, must-revalidate, proxy-revalidate";
                }
        }
}
Important: Next, go through the configuration file and look at the comments with three hash symbols (###), and change them to match your environment. If you don’t have DNS setup yet, you can change the redirect (HTTP –> HTTPS) to an IP address.
Downloading and Installing Pydio:
Start off by finding the direct download URL from here:
https://pyd.io/download/
Once you’ve found the URL, run this command to download Pydio to your server,
fetch "http://download.url.here"
Next, you need to extract Pydio with this command:
tar -xzvf pydio-*
Then move the extracted contents to the www folder with this command:
mv pydio-core-5.x.x /usr/local/www/pydio
Note: make sure you replace pydio-core-5.x.x with the name of the extracted folder you see.
Next, you should change ownership and permissions of the pydio folder with these commands:
chown -R www:www /usr/local/www/pydio
chmod -R 770 /usr/local/www/pydio
Next you need to set the locale for Pydio with this command:
ee /usr/local/www/pydio/conf/bootstrap_conf.php
Then set the following:
//define("AJXP_LOCALE", "en_EN.UTF-8");
To:
define("AJXP_LOCALE", "en_US.UTF-8");
Now you can start up nginx with the following:
service nginx start
Accessing Pydio and configuring Pydio:
With all that done, you should now be able to access Pydio at https://192.168.x.x (or whatever the IP address is of your web server).
From there you will be greeted with the Pydio configuration page. On that page, start off by setting up “Admin access”. From there, set a name, a display name, and a passphrase for the Administrator account. Afterwards, go to “Global options” and choose “English” as the “Default Language”.
Then in the “Configurations storage” area, fill in the fields as follows:
Storage Type: Database
Enable Notifications: Yes
Database: MySQL
Host: localhost
Database: pydiodb
User: pydio
Password: The password you chose earlier
Next, click on “Try connecting to the database”. This will verify the connection between Pydio and the MySQL server.
If the configuration is correct, you will have this message: “Connection established!”
Then you may click on “Install Pydio Now!”
Pydio is now setup and ready for you to login with the Administrator account.
Tips:
Upgrading FreeBSD Ports:
When new releases of PHP, nginx, and MySQL come out, you may want to upgrade them. To do this, first install a tool called portupgrade with this command:
cd /usr/ports/ports-mgmt/portupgrade/ && make install clean
When configuration dialog boxes appear, accept the defaults.
Next, you have to update the FreeBSD port tree with this command:
portsnap fetch update
Then to upgrade all ports at once, use the following:
portupgrade -a
Alternatively, you can have portupgrade prompt you before upgrading each port with this:
portupgrade -ai
Afterwards, your ports should all be up to date.
Note: I highly recommend taking a ZFS snapshot if possible before upgrading any ports.
Accessing Mounted Storage In Your Jail With Pydio:
After mounting storage into your jail, it may be tempting to grant your files 777 access to give Pydio access to them. With that said, don’t do it; there is an easy work around. Basically, you can add groups to the jail with the same GroupID as the ones on the host system.
Once at a shell prompt within the jail, find out what the GroupID is of the group that is assigned permissions on the mount with this command:
ls -l /mnt
You’ll then see a list of mount points such as this one:
drwxrwx---+ 7 1002 1001 8 Mar 3 18:35 Finance
The column with 1002 is the UserID, and 1001 is the GroupID. If you want Pydio to have access to the Finance mount, you need need to create the Finance group with a GroupID of 1001 in the jail, and have the www user in it.
To do this, start by editing /etc/group with this command:
ee /etc/group
Then add this to the bottom of the file:
Finance:*:1001:www
After saving the file, you can look at the permissions of the mount again by using:
ls -l /mnt
Now, you should see the following instead:
drwxrwx---+ 7 1002 Finance 8 Mar 3 18:35 Finance
You are now done. Pydio (www user) will now have access to the Finance mount.
Setting up Email For Pydio:
To setup email for Pydio, you may follow this tutorial and scroll down to FreeBSD:
Setting Up E-mailers
Setting a Default umask for PHP-FPM:
Although Pydio does allow for a default chmod on new files in a workspace, it will overwrite the inherited ZFS ACLs. This can cause issues when you’d like users to be able to access these same files on a Samba 4+ share.
A workaround for this is to set a default umask for PHP-FPM. To do this, edit PHP-FPM’s startup script with this command:
ee /usr/local/etc/rc.d/php-fpm
Next, add the following under “rcvar=php_fpm_enable”:
umask 0006
This will grant files and folders the following permissions:
Owner: rwx
Group: rwx
Everyone:
My inherited ACLs remain such as this:
owner@:rwxpDdaARWcCos:fd----:allow
group@:rwxpDdaARWc--s:fd----:allow
For this change to take effect, restart PHP-FPM with the following command:
service php-fpm restart
Fixing The 404 Error Page:
Depending on what URL is requested and not found/forbidden, the image (circle with a line through it) on the error page may not show up properly since the image src is using a relative path.
To fix this, edit the error page with this command:
ee /usr/local/www/pydio/data/public/404.html
Then change this:
<img src="button_cancel.png" style="position: absolute;left: 41px;border: 0px; top:36px;">
To the following, while replacing example.com with your domain name:
<img src="https://example.com/data/public/button_cancel.png" style="position: absolute;left: 41px;border: 0px; top:36px;">
Using the OpenSSL port instead of the one included with FreeBSD:
To ensure OpenSSL remains up to date, it’s best to use the ports version of it instead of the one included with FreeBSD. That way if a vulnerability is found, you can easily update OpenSSL with portupgrade.
To start, make sure your port tree is up to date with this command:
portsnap fetch update
Now edit /etc/make.conf:
ee /etc/make.conf
Then add the following line to /etc/make.conf. This will ensure that when ports require OpenSSL, they will use the ports version during compilation instead of the one included with FreeBSD:
WITH_OPENSSL_PORT=yes
Now install the OpenSSL port:
cd /usr/ports/security/openssl && make install clean
Since you’ve most likely already installed many applications that use OpenSSL, you’ll have to reinstall them so that they use the ports version with this command:
portupgrade -Rrf security/openssl
Note: If you don’t have portupgrade already installed, you can follow the steps a few sections above.